Create a Preview Environment for Your Remix Website
Storyblok is the first headless CMS that works for developers & marketers alike.
In this tutorial, we are going to learn the essential steps to prepare our site for deployment.
Unlike static site generators that pre-build pages, Remix leverages Server-Side Rendering (SSR), simplifying the integration with dynamic content platforms like Storyblok.
This tutorial concludes the Ultimate Remix Tutorial series. To fully grasp the content, it's essential to go through all the preceding parts.
For this tutorial, we’ll be using Netlify (opens in a new window) for deployment. This deployment method applies to any hosting provider supporting SSR deployment for Remix. You can find a comprehensive list of such providers here (opens in a new window).
If you’re in a hurry, look at our live demo on Netlify! Alternatively, you can explore or fork the code from the Remix Ultimate Tutorial GitHub Repository.
Preparing the codebase for Deployment
First, let's set up an environment variable.
We currently always fetch the draft version of the story from Storyblok in our code. We can make this dynamic, too.
STORYBLOK_TOKEN=xxxxx
STORYBLOK_IS_PREVIEW=yes
We introduce a new variable, STORYBLOK_IS_PREVIEW. If it's set to yes, we fetch the draft data from Storyblok. For any other value, we fetch the published data.
Showing environment variables to the client in Remix:
When we start Remix app with remix dev, it reads the environment variables from .env and let us use them in your code through process.env.
But Remix never exposes these variables to the client-side.
If we need to use environment variables on the client-side, we need to do it manually.
To integrate Storyblok with our Remix application effectively, we need to ensure that the accessToken for Storyblok is accessible on the client-side, especially when initializing Storyblok with storyblokInit. This is crucial for fetching and managing content directly from Storyblok in our client-side application. Here's how we can achieve this:
...
const isServer = typeof window === "undefined";

const accessToken = isServer
  ? process.env.STORYBLOK_TOKEN
  : window.env.STORYBLOK_TOKEN;

storyblokInit({
  accessToken,
    use: [apiPlugin],
  components
});
...
We also need to determine whether we're in preview mode to decide whether to activate the Storyblok bridge.
Storyblok Bridge is vital for the functionality of the Visual Editor. To make it work, the Storyblok SDK adds extra information to HTML elements. This is ideal for the preview environment, but it's recommended to disable it for the production site. For more in-depth information, you can start your exploration here.
Since we'll require the STORYBLOK_IS_PREVIEW in multiple locations, it's efficient to create a utility function as follows:
const isServer = typeof window === "undefined";
const isPreview = () => {
  let isPreviewValue = isServer
    ? process.env.STORYBLOK_IS_PREVIEW
    : window.env.STORYBLOK_IS_PREVIEW;

  return isPreviewValue === "yes";
};
export { isPreview };
To ensure the Storyblok Bridge is activated only in preview mode, let's import and utilize our utility function in root.jsx :
...
import { isPreview } from "~/utils/isPreview";
...
storyblokInit({
  accessToken,
  use: [apiPlugin],
  components,
  bridge: isPreview(),
});
...
To seamlessly integrate server-side environment variables into our client-side logic, it's essential to pass these variables from the server to the client.
First, we ensure that our environment variables are returned from the root loader.
export const loader = async ({ params }) => {
  let lang = params.lang || "default";

  return json({
    lang,
    env: {
      STORYBLOK_TOKEN: process.env.STORYBLOK_TOKEN,
      STORYBLOK_IS_PREVIEW: process.env.STORYBLOK_IS_PREVIEW,
    },
  });
};
Next, we retrieve them by using useLoaderData() in our App component and we inject them into the global window object.
Then, we can insert a script tag in the document's head to make the environment variables available to the client.
export default function App() {
  const { lang, env } = useLoaderData();
  return (
    <html lang={lang}>
      <head>
        <meta charSet="utf-8" />
        <meta name="viewport" content="width=device-width,initial-scale=1" />
        <Meta />
        <Links />
      </head>
      <body>
        <Layout>
          <Outlet />
          <ScrollRestoration />
          <Scripts />
          <LiveReload />
        </Layout>
        <script
          dangerouslySetInnerHTML={{
            __html: `window.env = ${JSON.stringify(env)}`,
          }}
        />
      </body>
    </html>
  );
}
This allows us to use window.env to access the environment variables in the client-side code.
Fetching content dynamically based on environment
In our $.jsx Splat Route source code file, we adjust content fetching based on the environment; draft content for previews and published content for production.
import { isPreview } from "~/utils/isPreview";
...
export const loader = async ({ params, request }) => {
...
  let version = isPreview() ? "draft" : "published";

  let sbParams = {
    version,
    resolve_relations: ["popular-articles.articles"],
    language,
  };

  const { data } = await getStoryblokApi().get(`cdn/stories/${slug}`, sbParams, { cache: "no-store" })
    .catch(e => ({ data: null }));

  if (!data) throw new Response("Not Found", { status: 404 });

  let { data: articles } = await getStoryblokApi().get(`cdn/stories`, {
    version,
    starts_with: "blog/",
    language,
    is_startpage: 0,
  },
   { cache: "no-store" }
);

  return json({ story: data?.story, articles: articles?.stories });
};- Version Selection: We use
isPreview()to choose betweendraftorpublishedcontent - Content Fetching: We apply this version when fetching both the main story and related articles
Deploying on Netlify
First, we create a new project in Netlify and import it into the Git repository.
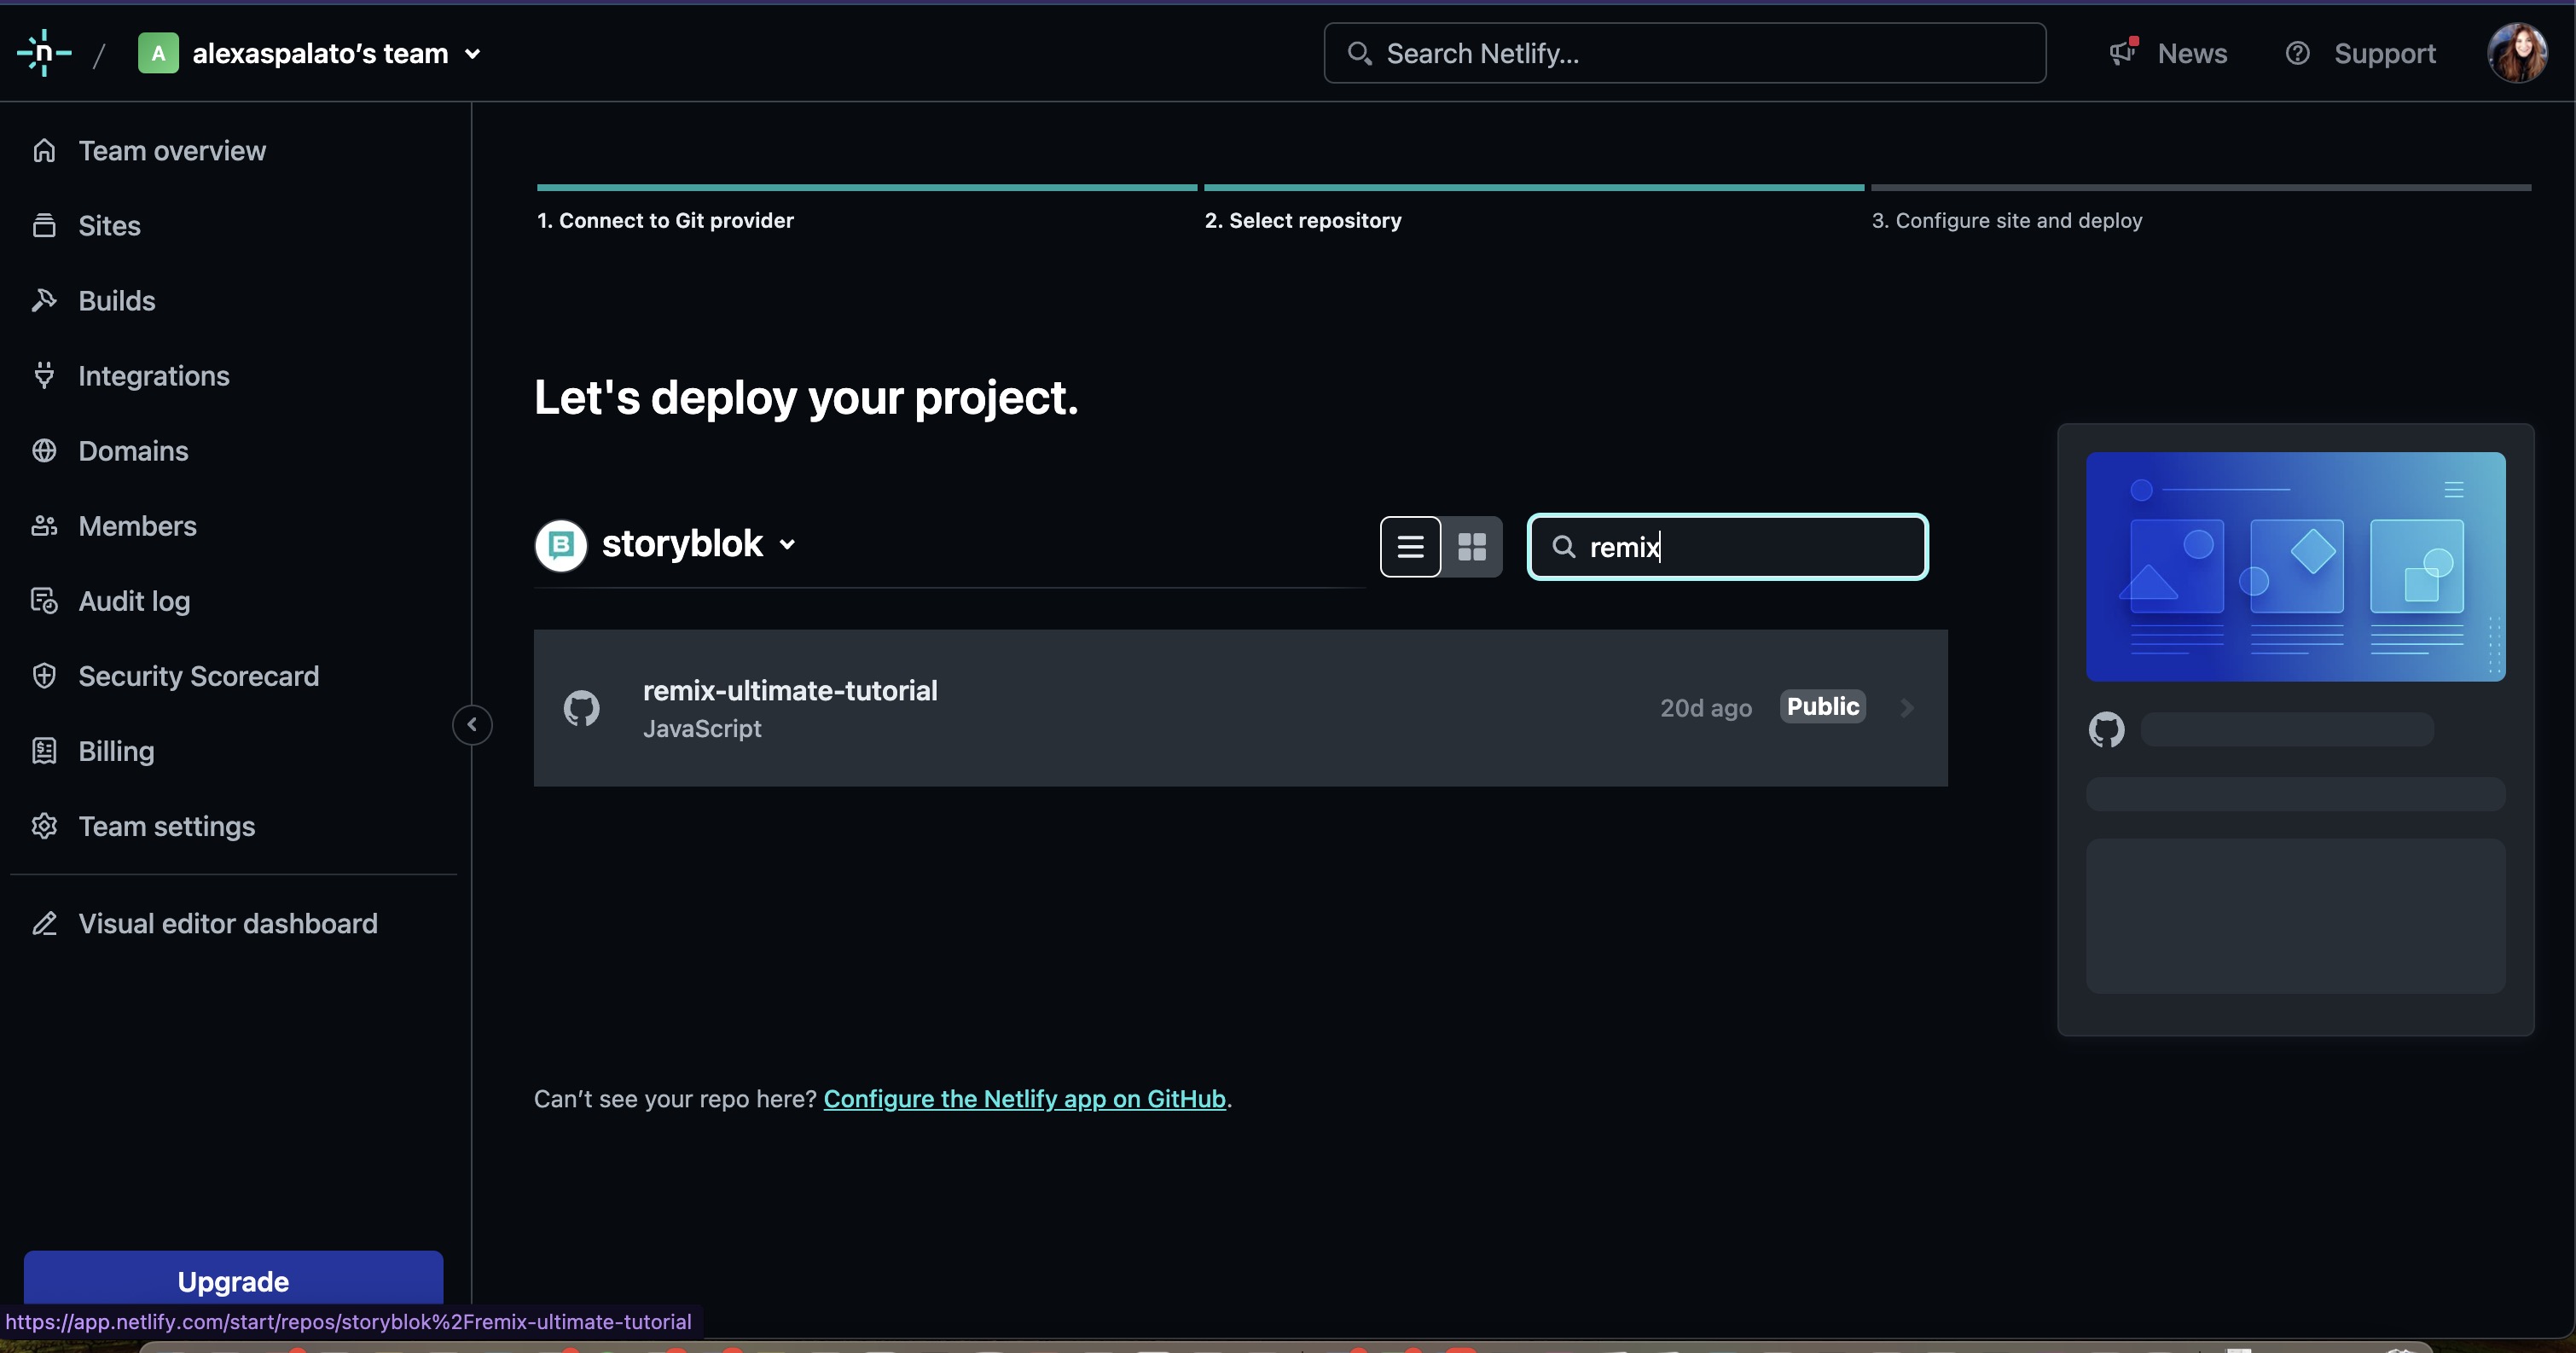
Create new project in Netlify
To establish separate URLs for preview and production environments, we have two approaches:
- Automatically generate a preview deployment for each pull request from any branch
- Use a dedicated branch specifically for preview deployments
After finishing this step, we input our environment variables and move forward to the deployment. On Netlify, we can assign different values to our variables based on the deployment context.
In this setup, we configure the STORYBLOK_IS_PREVIEW variable to no for the production environments and yes for all other contexts.

Add env variables in your netlify project
That's it! We have now successfully deployed our Remix site. Also, we have different URLs for production, preview, and branches. We will use the preview URL (or a branch URL) in Storyblok to preview our website and leverage Storyblok's Visual Editor.
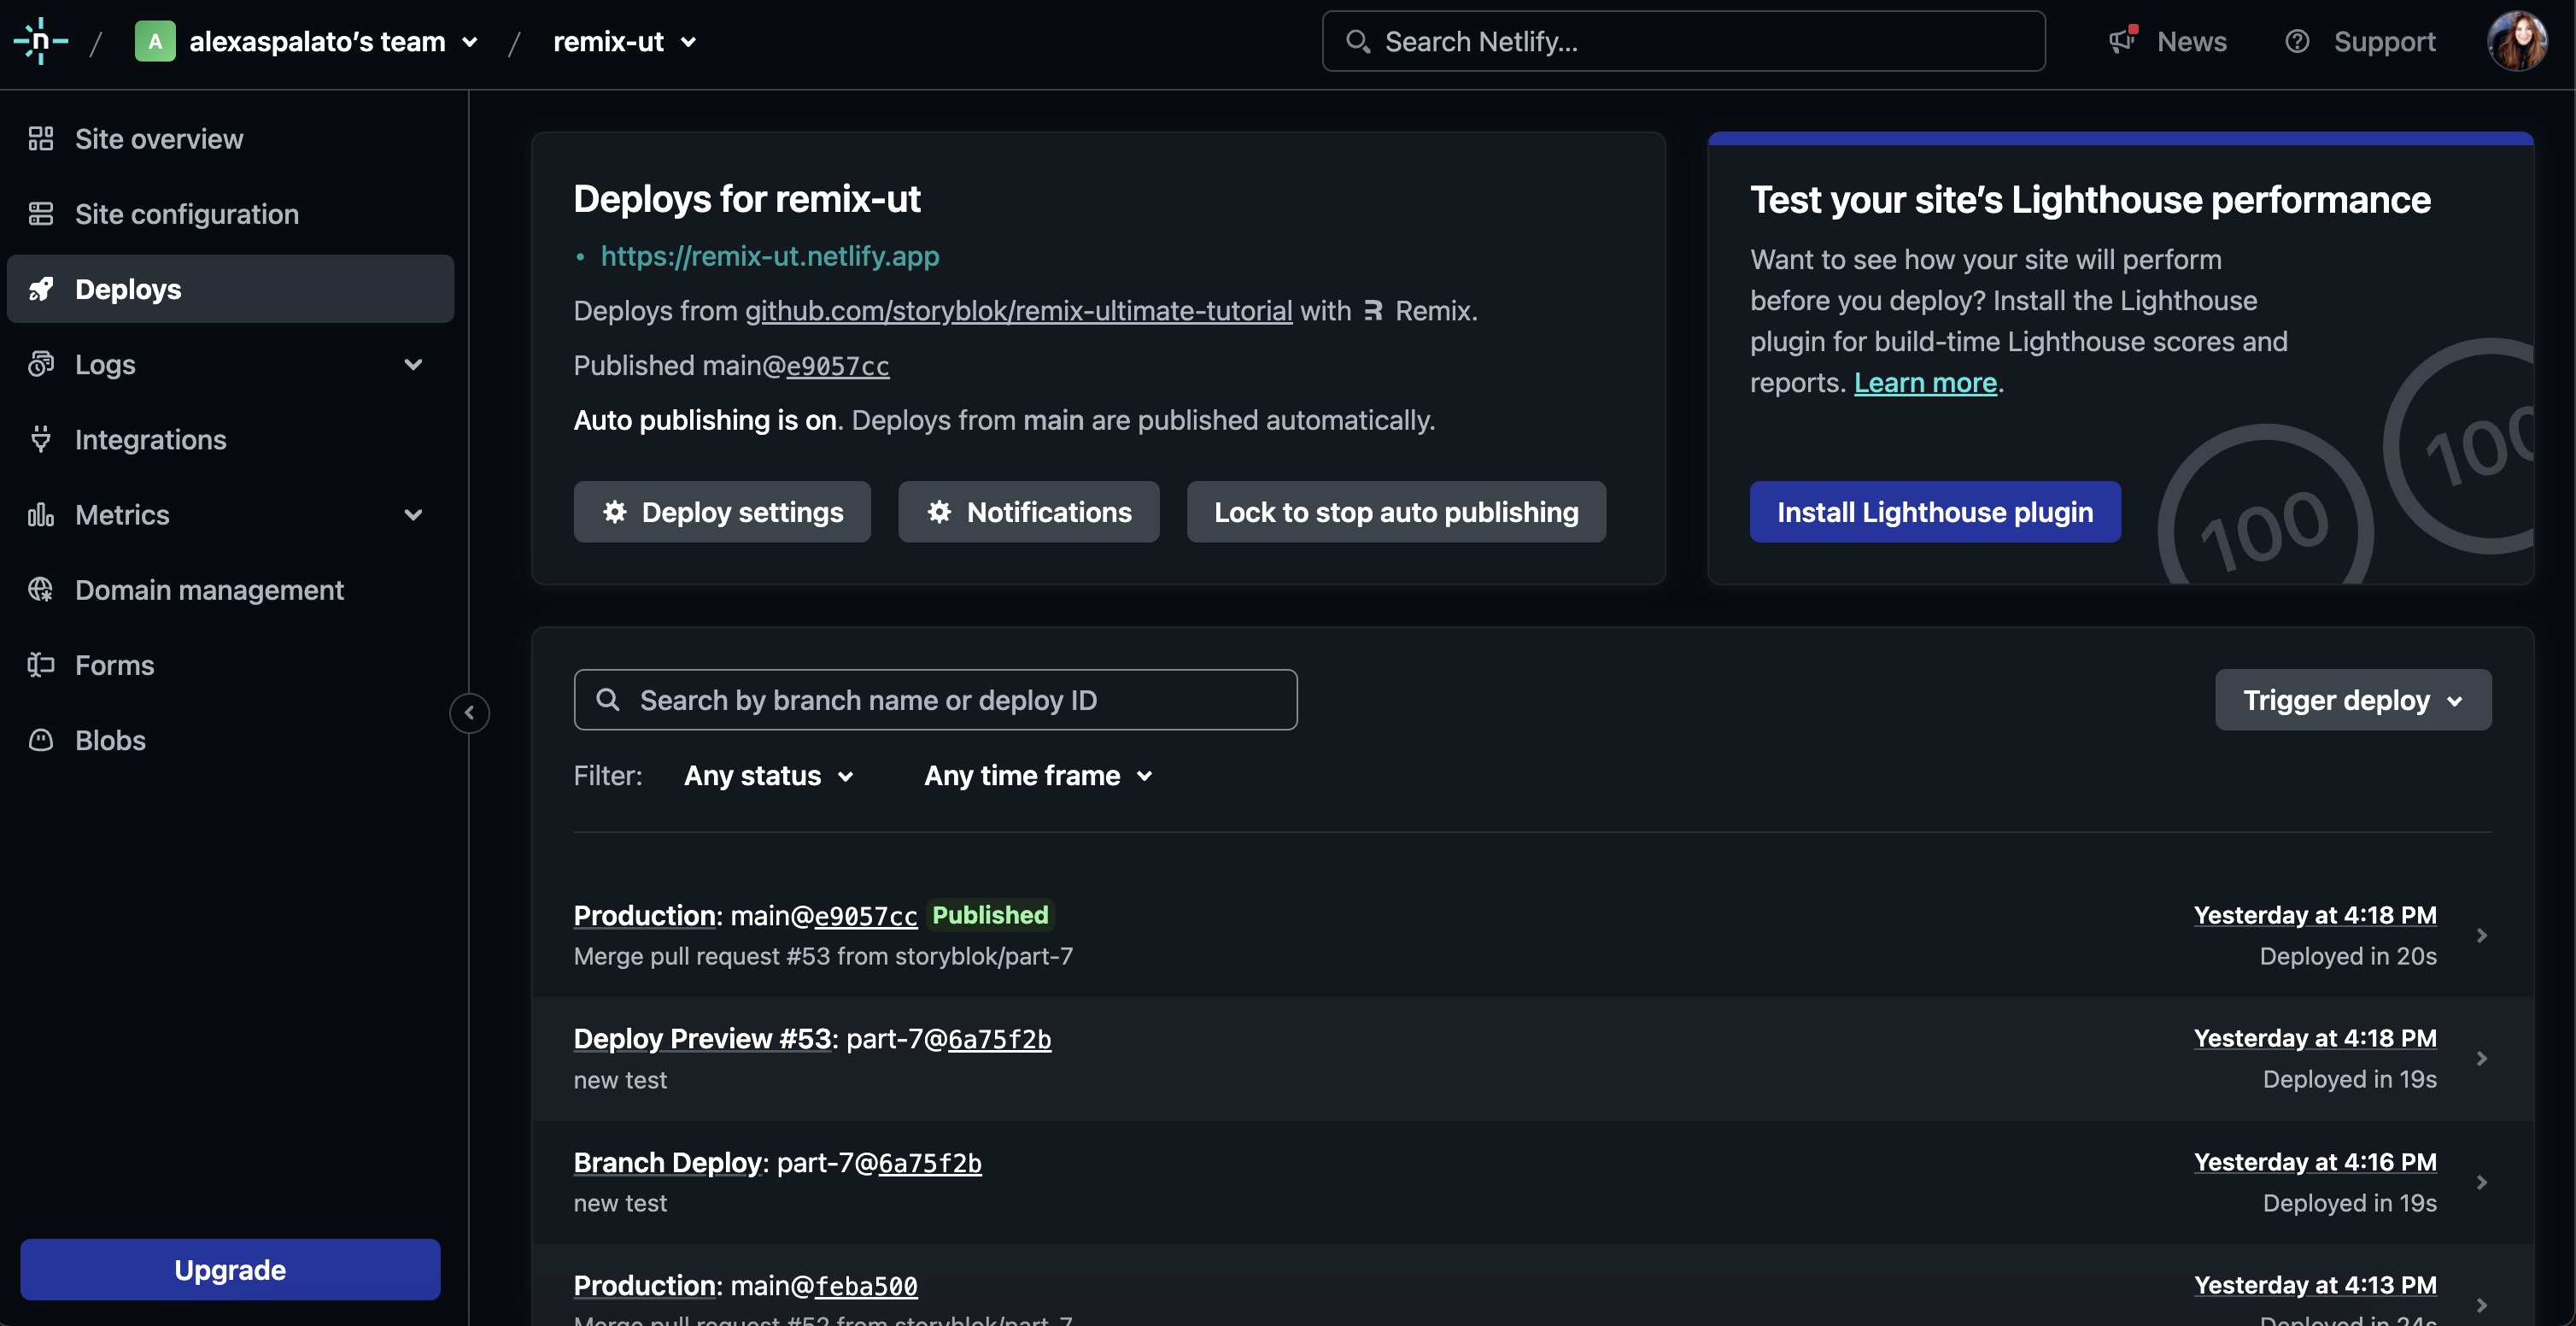
Deploys in Netlify
Adding Production and preview URLs in Storyblok
Now, we need to input both the preview and production URLs in Storyblok's settings.
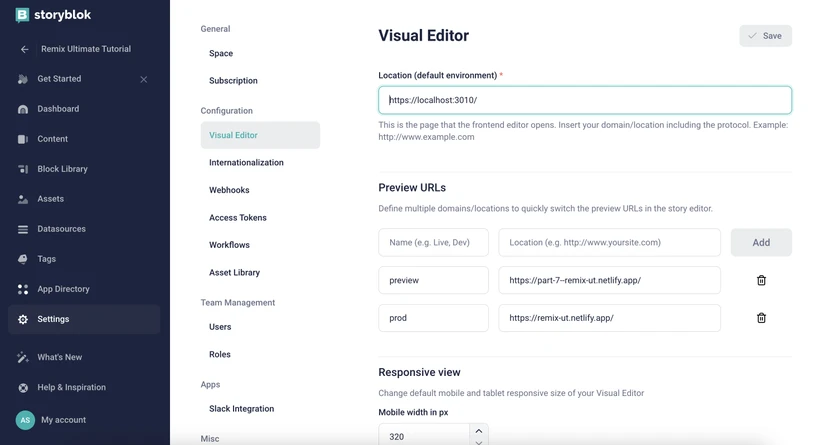
Add preview URLs in Storyblok
Conclusion
You have successfully acquired the skills to develop a comprehensive Remix website using Storyblok. Throughout this tutorial, you have learned the essential steps to prepare our Remix site for deployment.
| Resource | Link |
|---|---|
| Storyblok Remix Ultimate Tutorial | https://www.storyblok.com/tp/the-storyblok-remix-ultimate-tutorial |
| Github repository | https://github.com/storyblok/remix-ultimate-tutorial |
| Storyblok Technologies Hub | https://www.storyblok.com/technologies |
| Remix Technology Hub | https://www.storyblok.com/tc/remix |
| Storyblok React SDK | https://github.com/storyblok/storyblok-react |
| Remix docs | https://remix.run/docs/en/main |
